Do I need to create my own instances?
If you are:
- teaching at or attending a centrally organized Data Carpentry workshop,
- a Maintainer for one of the Metagenomics lessons, or
- contributing to the Metagenomics lessons,
The Carpentries staff will create AMI instances for you. Please contact team@carpentries.org.
If you are:
- teaching at a self-organized workshop,
- working through these lessons on your own outside of a workshop,
- practicing your skills after a workshop, or
- using these lessons for a teaching demonstration as part of your Instructor checkout for The Carpentries,
you will need to create your own AMI instances using the instructions below. The cost of using this AMI for a few days, with the t2.medium instance type is very low (about USD $2.00 per day). Data Carpentry has no control over AWS pricing structure and provides this cost estimate with no guarantees. Please read AWS documentation on pricing for up-to-date information.
Launching an instance on Amazon Web Services
Prerequisites
- Form of payment (credit card)
- Understanding of Amazon’s billing and payment (See: Getting started with AWS Billing and Cost Management)
- You can use some of Amazon Web Services for free, or see if you qualify for an AWS Grant (See: https://aws.amazon.com/grants/ ) if you are using AWS for education. The free level of service will not be sufficient for working with the amount of data we are using for our lessons.
Create an AWS account
1. Go to Amazon Web Services https://aws.amazon.com/
2. Follow the button to sign up for an account - you will need to agree to Amazon’s terms and conditions and provide credit card information.
Sign into AWS and Launch an Instance
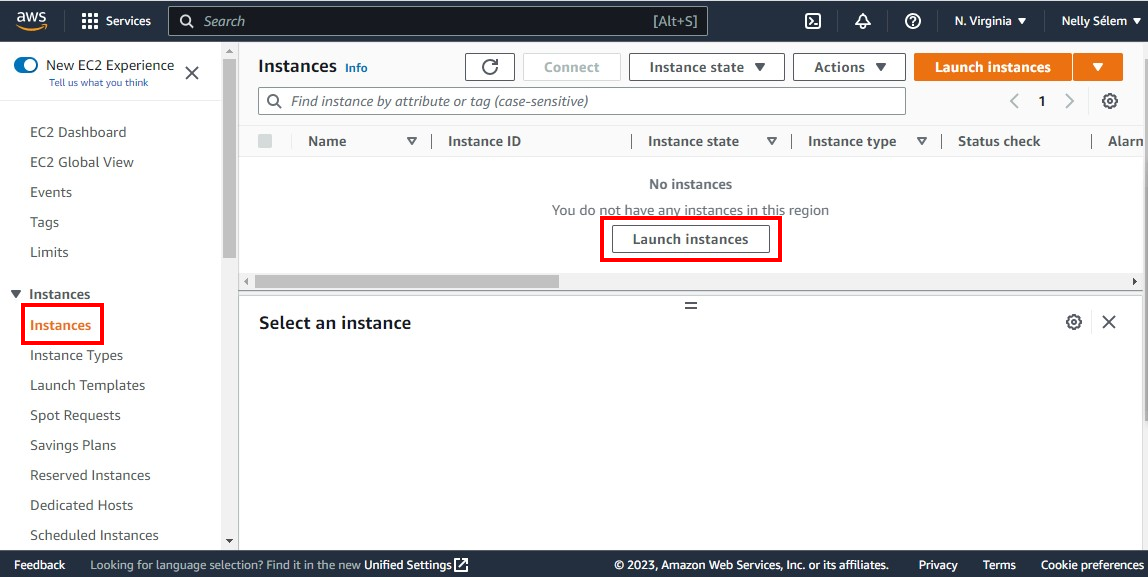
1. Sign into the AWS EC2 Dashboard: https://console.aws.amazon.com/ec2/
2. Click on the ‘Instances’ word on the lefthand bar and then on the ‘Launch Instance’ button in the middle.
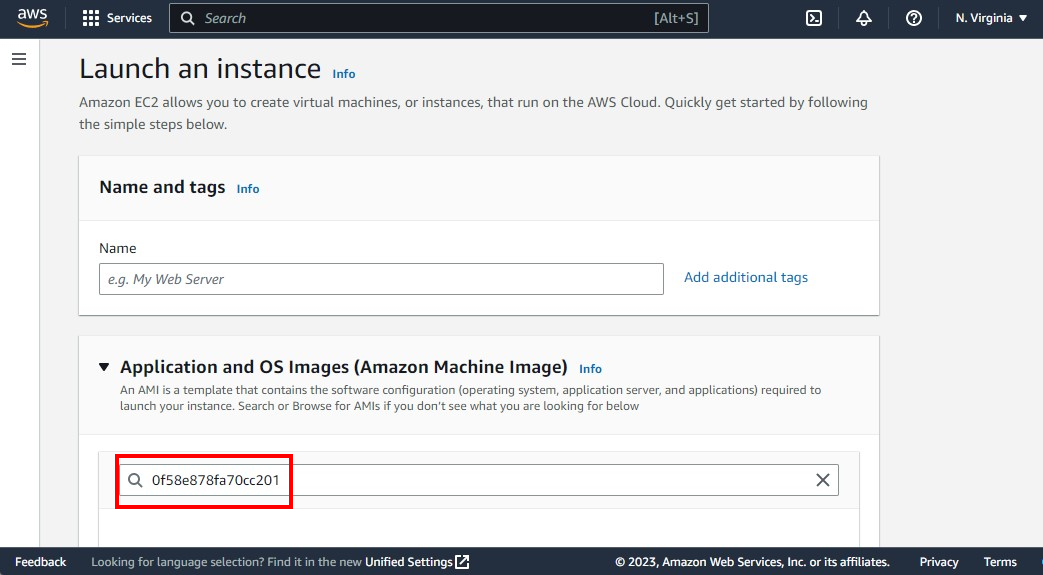
3. A new page will appear, scroll down to “Application and OS Images (Amazon Machine Image)” then, in the bar enter the code 028155394f1e36b0d
and click Enter. This image is the AMI listed on this curriculum’s
Setup page.
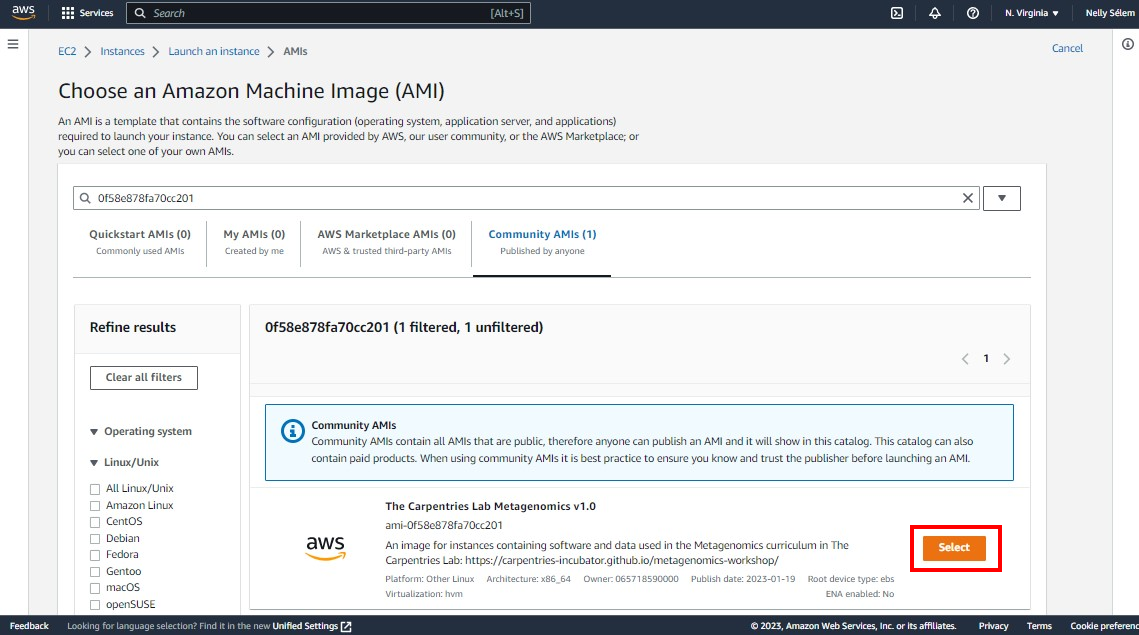
4-. A page with the title “Choose an Amazon Machine Image (AMI)” will appear with a box showing the “The Carpentries Lab Metagenomics v1.0” image under “Community AMIs”. Click “Select” in that box.
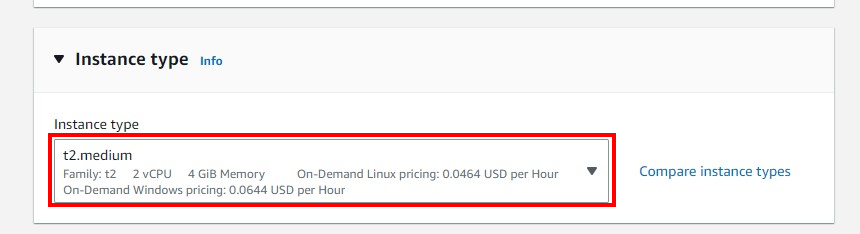
5. In the next page go to the box Instance Type and select t2.medium.
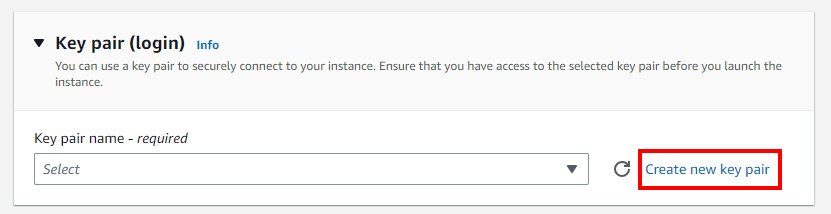
6. In the same page, scroll down to the box “Key pair (login)” and click in “Create new key pair” to create Key Pair.
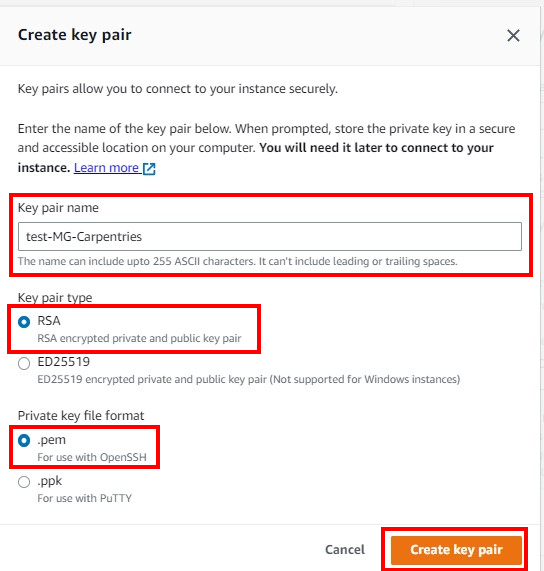
Give a name of your choice in the box “Key pair name”, select “RSA” and “.pem” in the “Key pair type” and
“Private key file format” sections, respectively. And click on “Create key pair”. Your key pair should be automatically downloaded, is a file with .pem enxtension. Move it from your Downloads folder to a stable location on your computer.
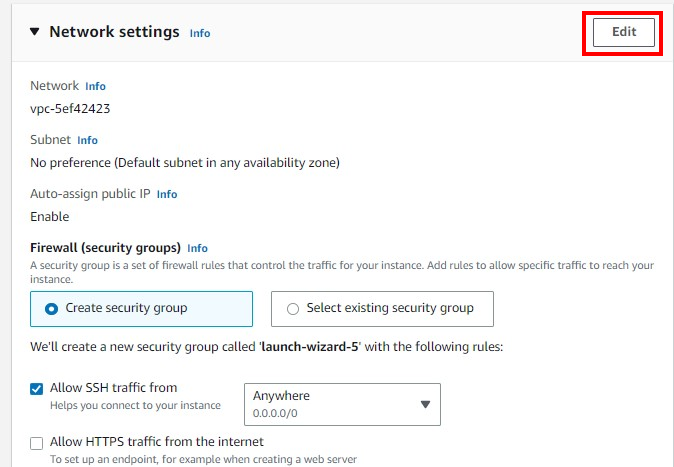
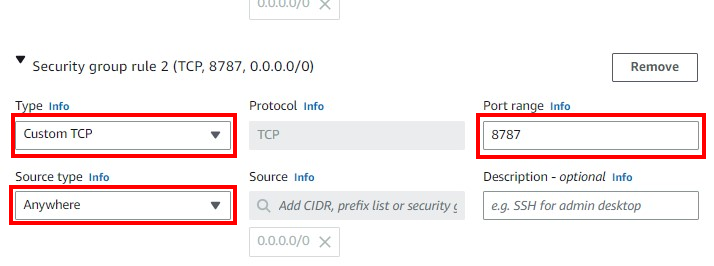
7. In the same page scroll down and click “Edit” in the “Network settings” box, then click on “Add security group rule”.
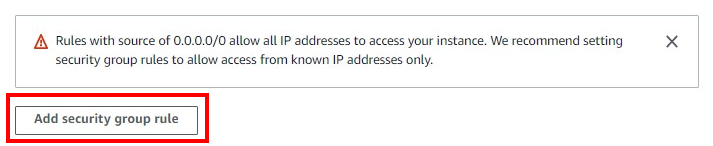
In the section “Security group rule 2”, keep selected the Type “Custom TCP” and select the Source type “Anywhere”, and write “8787” in the “Port range” box.
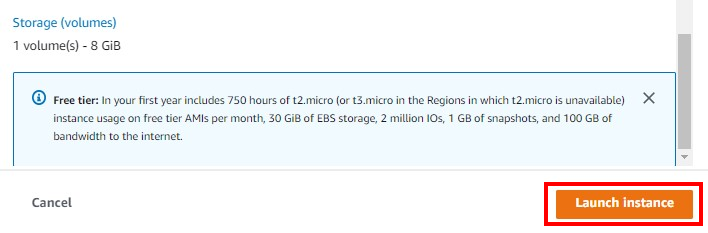
8. Scroll to the bottom of the page and click “Launch instance”.
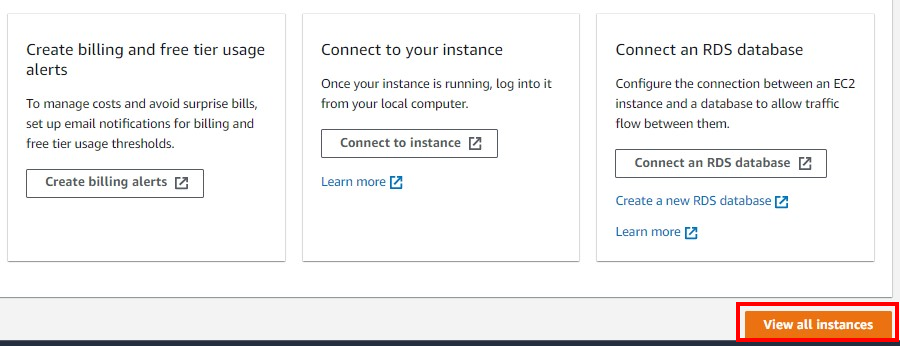
9. Scroll to the bottom of the page and click “View all instances”.
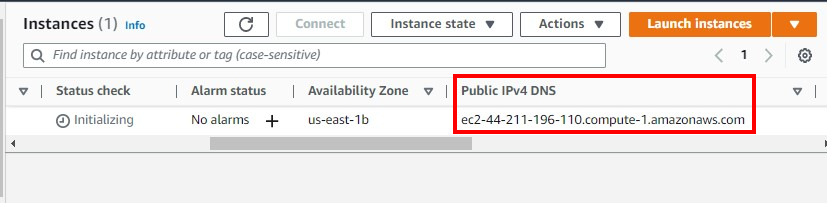
10. Use the latteral scroll to see the information of your instance. The Public IPv4 DNS is what you will use to conect.
Connect to your Amazon Instance (MacOS/Linux)
Log into your AWC EC2 Dashboard https://console.aws.amazon.com/ec2/
You should see that you have one instance. To proceed, the instance state must be ‘running’ (if you just launched the instance it will take <5 min for the instance to start running).
At the bottom of the dashboard, you should see a Public IPv4 DNS which will look something like ec2.12.2.45.678.compute-1.amazonaws.com. Copy that address (you may wish make a note of it as you will need this each time you connect.)
Open the terminal application on your computer. Use the following commands to navigate to your Desktop and modify the file permissions for your key pair file.
$ cd ~/Desktop
$ chmod 700 *.pem
- You can now connect to your instance using ‘ssh’. Your command will be something like this:
$ ssh dcuser@ec2-3-89-254-171.compute-1.amazonaws.comBe sure to replace
ec2-3-89-254-171.compute-1.amazonaws.comwith the DNS for your image. You may be notified that the authenticity of the host cannot be verified - if so, ignore the warning an continue connecting
- When prompted, enter the password
data4CarpYou should now be connected to your personal instance. You can confirm that you are in the correct location by using the
whoamiandpwdcommands, which should yield the following results:$ whoami dcuser $ pwd /home/dcuser
Connect to your Amazon instance (Windows)
Download the PuTTY application at: http://the.earth.li/~sgtatham/putty/latest/x86/putty.exe
Log into your AWC EC2 Dashboard https://console.aws.amazon.com/ec2/
You should see that you have one instance, make sure instance state is ‘running’ (if you just launched the instance it will take <5 min for the instance to start running)
At the bottom of the dashboard, you should see a Public DNS which will look something like ec2.12.2.45.678.compute-1.amazonaws.com. Copy that address (you may wish to make a note of it as you will need this each time you connect.)
Start PuTTY. In the section ‘Specify the destination you want to connect to’ for ‘Host Name (or IP address)’ paste in the DNS address and click ‘Open’
When prompted to login as, enter ‘dcuser’; you may be notified that the authenticity of the host cannot be verified - if so, ignore the warning an continue connecting
When prompted, enter the password
data4CarpYou should now be connected to your personal instance. You can confirm this with the following commands;
whoamiandpwd, which should yield the following results:Last login: Thu Jul 30 13:21:08 2015 from 8.sub-70-197-200.myvzw.com $ whoami dcuser $ pwd /home/dcuser
Terminating your instance
Very Important Warning - Avoid Unwanted Charges
Please remember, for as long as this instance is running, you will be charged for your usage. You can see an estimate of the current charge from your AWS EC2 dashboard by clicking your name (Account name) on the upper right of the dashboard and selecting ‘Billing & Cost Management’. DO NOT FORGET TO TERMINATE YOUR INSTANCE WHEN YOU ARE DONE
When you are finished with your instance, you must terminate it to avoid unwanted charges. Follow the following steps.
- Sign into AWS and go to the EC2 Dashboard: https://console.aws.amazon.com/ec2/
- Under ‘Resources’ select ‘Running Instances’
- Select the instance you wish to terminate, click on “Instance state” and in the menu select “Terminate”.

Warning
Terminating an instance will delete any data on this instance, so you must move any data you wish to save off the instance.
- Select ‘Yes, Terminate’ to terminate the instance.
Reference
This notes are adapted from the Data Carpentry Genomics Workshop corresponding page